Showing posts with label remodel. Show all posts

Friday, May 29, 2015

Bedrooms: New and Renewed

In decorating each bedroom (my daughters did their own) I considered each person's hobbies or needs, restrictions that come with kids sharing rooms, and natural light.


Master Bedroom Renewed


Those of you who have followed this renovation know that the major reason we did this was because we needed another bedroom. After four years on a buyer's market, the house didn't sell and my husband and the two wonderful boys (kids no. 5 and 6) that I got pregnant with were sharing our bedroom.

Now, they are out and moved into their own bedroom, (pics to come) and we now have the relaxing romantic suite that makes us feel like we are always on vacation.


Years ago, I fell in love with the color combination of grays and browns. I'm a neutral girl all the way, but if you look closely then you'll see a royal blue accent color. It'll be fun to change out the accent colors depending on the time of year.

Remembering the rules of designing for a husband and wife from an old show called Designing For The Sexes, I made sure the geometric patterns balanced out flowery decor.


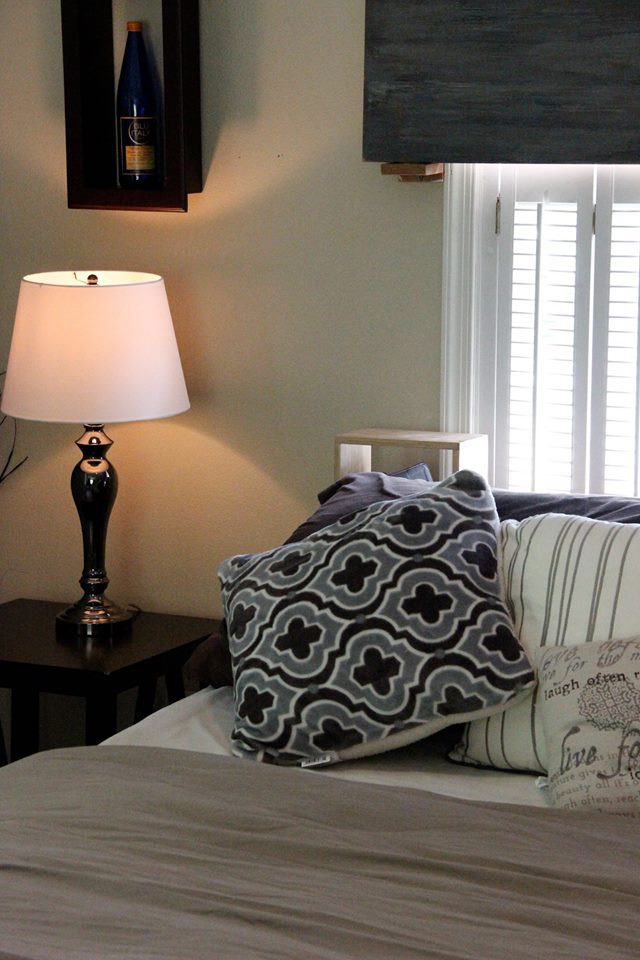
Websites like Pinterest and Houzz and stores like Home Goods, Michaels, TJMaxx, Target, Bed Bath and Beyond, World Market and Tuesday Morning (pant, pant) helped me to design this 23 x 14 master bedroom.

The colors go perfectly with our newly renovated master bath.


Daughter's Bedrooms

Artfully practical are the words that come to my mind when it comes to my daughter's new rooms located in the 2nd floor of our new addition.


 All that will complete her stylish look is bookshelves and wall hangings.


Older Sons' Bedrooms

My teen and adult sons got a renewed bedroom also. 
The perfect guy pad. A queen bed for my 6'4 1/2 son. A futon for the college grad when he is at home. He can take it with him when he moves into his first place if he wants to.


Little Boys Room


Friday, February 6, 2015

From this 2 this:

The first stage of the house's face lift!

Original: 


This front room has been through many transformations. When we first bought the house, the carpet was gross, full of pet urine and ugly dark paint. Before we moved in, we laid new carpet and painted in order to use this room as our living room. 

Then we built our great room, changed the carpet to laminate and this room became our dining room. Usually the table was placed lengthwise but once this current renovation and the old "office/playroom" was torn down, we had to double the dining room as a play area.

Old dining room


For those of you familiar with home renovations, you know that when you have to create multi-purpose space for the duration of the project, life can get cramped. But oh well. 

This week they removed the old window and door (picture above). We had to put the dining room in the middle of the kitchen, move the portable Pier 1 island along a wall in this front room, create a place for the computer desk, as well as toys. But oh....I love the new window and door. I'm not sure when they'll put up the drywall, mud and tape, but in the meanwhile, my goal is to keep things clean and safe for the little boys, as well as give a semblance of space among cramped quarters.


New wall for future front entry room

Here are some inspiration pictures that I'm using to decide the paint color for the inside of the door, as well as decor. It will be a rather unorthodox foyer/front entry room because the whole area is 16 x 13. Creating a wall to divide the space for a small office was not in the budget. So I'm going to divide the space with a DIY shoji screen-of-sorts to make a place area/school room...future office, and still have sufficient space for a proper foyer. You can see  other inspirational pictures on my Pinterest boards: https://www.pinterest.com/tinacwebb/